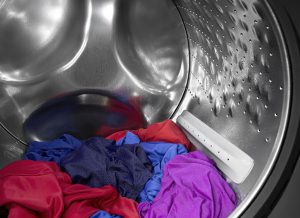
1. The Rubber Seals
As we mentioned in the introduction, the rubber door seals and gasket are particularly prone to a build-up of mold and soap scum. Start by soaking some old towels with either white vinegar or hydrogen peroxide. Then pack those towels into the gasket cavity and leave them for an hour to loosen any mold and grease lurking there. This should disinfect the area thoroughly, and you can wipe the door seals and gasket clean. If there are any stubborn areas, you can scrub off this residue with an old toothbrush soaked in white vinegar or simply repeat the process.
2. Run the Washer
Now the gaskets are clean; you can turn your attention to the washer by setting it on the hottest setting and the largest load size. Then fill the dispensers with a mix of 1 quart white vinegar and ½ cup of baking soda. If you don’t have any vinegar on hand, you can substitute with hydrogen peroxide, citric acid, oxygen bleach, or a chlorine based bleach. Pour the white vinegar in the detergent dispenser and place the baking soda in the softener dispenser. Then run the wash cycle until it finishes.
3. Clean the Exterior
When the wash cycle is running, you can use that time wisely and clean the exterior of the washer. Take a cloth soaked with white vinegar and rub at all those nooks and crannies on your front loading washer. Obviously, you cannot get to the top or rear of the washer, but you can do that another time when checking the hoses and fixtures. This will disinfect the front of your washer and make it fresher and cleaner.
4. The Second Wash Cycle
Once the first wash cycle is completed, you can run a second wash cycle using only hot water. If you want to get rid of any residue that may be remaining after the first wash, you can add a little vinegar. Once this second wash cycle is finished, leave the door open to dry the drum and prevent the formation of mildew.
5. Clean the Components
Get a smaller towel, soak it with vinegar, and then wipe down the inside of the dispenser. You can use an old toothbrush to get into any seals and tight spaces to get the vinegar into the cracks. Scrub at the rims, edges, and other areas that come into contact with water. If the dispenser can be removed, it’s easier to clean it over the sink and replace it later.
6. Cleaning Ingredients
As you may have noticed, a lot of the cleaning ingredients used in the sanitation process for your front loading washer are not store bought cleaning products. Both vinegar and baking soda are excellent at cleaning and deodorizing because they are natural ingredients. White vinegar is an acetic acid, but it’s extremely mild, and it cannot kill all of the mold with a single pass. So, if you have a very dirty and mold machine, you may need to try an oxygen bleach and enzyme detergent instead. If your washer is still struggling to deliver clean clothing, you can rely on a home appliance repair technician to help. An experienced technician can evaluate your machine to determine any underlying issues that may compromise performance.
